
This year I'm participating in a bi weekly challenge with some blogging friends to post recipes using all of the letters in the alphabet. It can feature a food that begins with the letter of the week or the recipe name can contain the week's letter.

After a string of cakes that were very underwhelming I decided that I would make my own over-the-top decadent treat for my birthday this year. I'd had this Brooklyn Blackout Cake recipe printed for quite a while and it fit perfectly in with the B theme for this week.

The chocolate pudding filling is worth making on it's own, honestly. I sampled it while it was still warm and I almost just sat with the bowl and a spoon and ditched the plans for the cake.

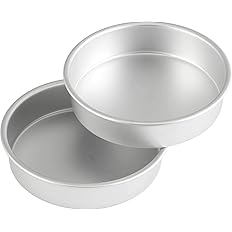
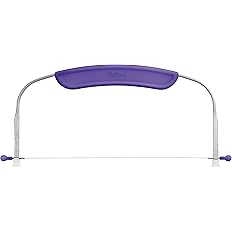
If you're nervous about splitting the cake layers you can always use 4 8" pans and reduce the baking time. I love my Wilton Adjustable Leveler, it makes it super easy to get nice even layers.

I wasn't sure about adding the hot water to the melted chocolate/butter for the frosting, I thought for sure it was going to seize but I was happily surprised. It took a bit longer for mine to set up to be spreadable but people were in and out of the fridge a bunch.

Do yourself a big favor and before you frost, tuck wide strips of parchment paper underneath the edges of the cake. That helps keep your platter clean when you start pressing the crumbs onto the sides. After the cake is all covered you can gently ease the strips out.

Are my layers perfect? Nope. Was it a lot of work to make everything from scratch? Yep. Was it worth it? Absolutely! Not only is this the best cake I've made, it's one of the best I've ever eaten.

The guys (who have proclaimed things "too chocolatey" in the past) had theirs with a scoop of vanilla bean ice cream but I enjoyed mine straight.

Thank you again to Wendy for hosting the 2024 Alphabet Challenge and to the other bloggers for sharing their recipes this week! Check them out using the links down below! You can see all of the recipes I've made for the challenge here- Alphabet Challenge 2024
Brooklyn Blackout Cake

Ingredients
- 1/2 cup sugar
- 2 tablespoons cornstarch
- 1/4 teaspoon salt
- 1-1/2 cups whole milk
- 3 ounces semisweet chocolate, chopped
- 1 teaspoon vanilla extract
- 1-1/2 cups all-purpose flour
- 2 teaspoons baking powder
- 1/2 teaspoon baking soda
- 1/2 teaspoon salt
- 1/2 cup unsalted butter, cubed
- 3/4 cup Dutch-processed cocoa
- 1 cup sugar
- 1 cup packed brown sugar
- 1 cup buttermilk
- 1 cup strong brewed coffee
- 1 teaspoon vanilla extract
- 2 large eggs
- 8 ounces semisweet chocolate, chopped
- 1/2 cup unsalted butter, cubed
- 1/3 cup hot water
- 2 teaspoons light corn syrup
- 2 teaspoons vanilla extract
Instructions
- In a small heavy saucepan, mix sugar, cornstarch and salt. Whisk in milk. Cook and stir over medium heat until thickened and bubbly. Reduce heat to low; cook and stir 2 minutes longer. Stir in chocolate until melted. Transfer to a bowl; stir in vanilla. Cool slightly, stirring occasionally. Press plastic wrap onto surface of pudding. Refrigerate, covered, 2 hours or until cold.
- Preheat oven to 325°. Line bottoms of two greased 8-in. round baking pans with parchment; grease paper. In a small bowl, whisk flour, baking powder, baking soda and salt. In a large saucepan, melt butter over medium heat. Add cocoa; cook and stir until blended. Stir in sugars. Remove from heat; stir in buttermilk, coffee and vanilla. Whisk in eggs, one at a time, until blended. Stir in flour mixture just until combined.
- Transfer batter to prepared pans. Bake 35-40 minutes or until toothpick inserted in center comes out clean. Cool in pans 10 minutes before removing to wire racks; remove parchment. Cool completely.
- For frosting, in the top of a double boiler or a metal bowl over hot water, melt chocolate and butter; stir until smooth. Remove from heat. Whisk in hot water, all at once. Whisk in corn syrup and vanilla. Refrigerate 25-30 minutes or just until spreadable.
- Using a long serrated knife, cut each cake horizontally in half. Place a cake layer on a serving plate. Spread with half of the pudding. Repeat layers. Top with a third cake layer. Spread frosting over top and sides of cake.
- Crumble remaining cake layer; sprinkle over top and sides of cake, pressing lightly to adhere. Refrigerate leftovers.


Palatable Pastime: Blueberry Biscuits

You are the B champion!!! This cake looks absolutely to die for! It is gorgeous.
ReplyDeleteToo chocolatey?! Is that a thing? Ha. I still need to read up on the history of this cake. But I will definitely be making it soon. Thanks for the inspiration, Jolene.
ReplyDeleteHow can a cake be too chocolatey? Lol. This looks amazing and the dark color is calling my name. Happy birthday?
ReplyDeleteBelated Birthday wishes. Wow what a chocolatey super duper cake. Though it is a bit of work, home baked are always the best. Just love the dark colour. And the layers are pretty even.
ReplyDeleteIs there such a thing as too chocolatey? I think I would have eaten it all by myself rather than share! Definitely worth all of the effort!!!
ReplyDeleteI am loving this cake! Please pass me a slice immediately. This is going in my list to bake.
ReplyDelete